For Chris
How to edit the website
Change your prices, your garments and the wording yourself. A change shows up on the site about two minutes after you save it.
There are two ways to change the site. The quick one is to tell Claude what you want:
chrispowersprint.com/ask.html
Ask ClaudeThe other is the editor, a set of forms you fill in yourself, at chrispowersprint.com/admin/. Both work in the browser on a computer or a phone. There is nothing to install.
- One-time setup
- Signing in
- Ask Claude to do it
- The editor: finding your way around
- Change prices and minimums
- Add or change a garment
- Change the words on the pages
- The Instagram photos
- If something goes wrong
Do this onceOne-time setup
You need your own free GitHub account. It takes about five minutes.
- Go to github.com/signup and create an account with your own email address. Choose a password only you know.
- Send Kevin the username you picked.
- Kevin adds you to the website. GitHub then emails you an invitation: open it and click Accept invitation.
- Bookmark the Ask Claude address at the top of this page.
Why do I need a GitHub account?
The website is really a folder of files: your prices, your garment list, your words, and a recipe that turns them into pages. That folder is kept on GitHub, a service that stores files and remembers every change ever made to them.
Your GitHub account is your key to that folder. Ask Claude and the editor are the friendly front doors, so you never have to look at GitHub itself after this setup.
Every now and thenSigning in
- Open Ask Claude or the editor.
- Click Sign in with GitHub. In the editor there is a second button under it; ignore that one, it is for Kevin.

In the editor, use the top button. - The first time only, a small GitHub window asks you to authorize the website editor. It may be named after another website Kevin looks after; that is the right one. Click the green Authorize button.
- You are in. You stay signed in on that computer or phone, so most days you skip straight to making changes. If you ever do sign in again, the small window opens and shuts by itself. That is normal.
What is the sign-in actually doing?
The page asks GitHub who you are. GitHub checks with a small sign-in helper that Kevin runs, then hands the page a temporary pass. That pass renews itself quietly in the background.
Your password never goes to this website. If you have not been here for about six months, it will ask you to click the sign-in button again.
The quick wayAsk Claude to do it
Claude is an AI assistant. On the Ask Claude page your website is on the left and Claude is on the right. You say what you want in your own words, Claude prepares it, and nothing is public until you press Publish.
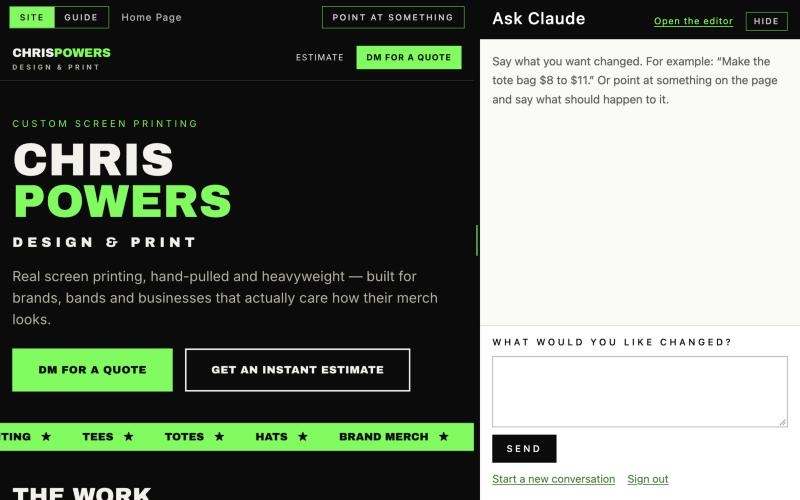
- Open Ask Claude and sign in.
- Type what you want. For example: "Make the tote bag $8 to $11", "Add a Comfort Colors long sleeve at $16 to $20, in black and ivory", "Raise the minimum to 12 pieces per color", or "Change the headline on the green band to Ready when you are".
- To talk about one particular thing on the page, click Point at something above the website, then click the thing itself. A pink outline shows what you are about to pick. Then say what should happen to it: "make this bigger", "reword this".
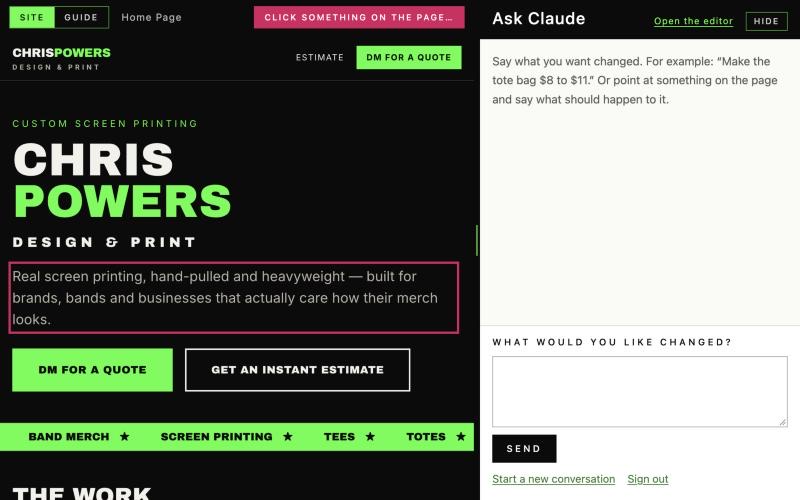
Pointing is on: the paragraph under the pointer has a pink outline. Click to pick it. - Read Claude's answer. It says exactly what it changed. A list headed Ready to publish shows everything that is waiting.
- If it is what you meant, press Publish. If it is not, say what to fix, or press Discard these changes to drop it.
- Claude's side then says "Published. The site will show it in about two minutes." After that, open the real site and look.
What you see on the left. Changes to wording and to how things look (colours, sizes, spacing) show up on the left straight away, before you publish. Changes to prices, minimums, discounts and garments do not: they live inside the estimate tool, which only runs on the real site. For those, Claude tells you the numbers it changed, and you check the estimate page after publishing.
Claude can change wording, prices, garments, and how things look. It cannot add a new page or a new feature, or change how the estimate tool works; that is still Kevin.
Drag the bar between the two sides to make Claude's side wider or narrower. Hide tucks it away so the website fills the window, and Show Claude brings it back.
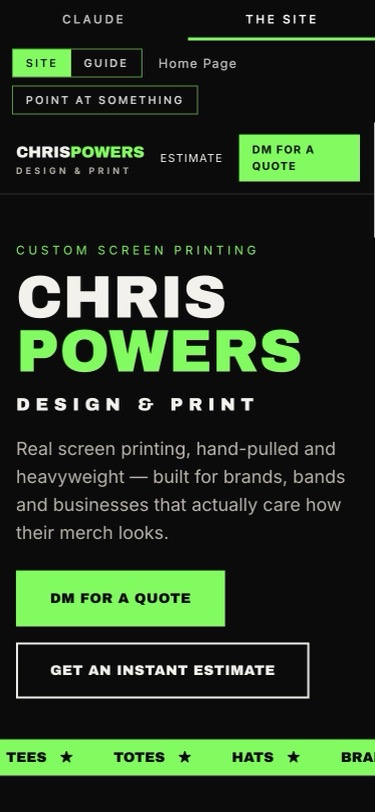
On a phone the two sides become two tabs at the top: Claude and The site. Tap The site to look, and Claude to carry on.
What is Claude actually doing?
It reads the same three small files the editor works with (prices, garments, words), writes new versions of the ones that need changing, and holds them until you decide. Before it holds anything, the page checks the numbers make sense: a price range the right way round, a discount under 100 percent, at least one garment showing.
Changes to how things look go into one small separate file, so undoing one is just taking a line back out.
Publish saves everything together with your name on the change. GitHub keeps the history, so a mistake can be undone.
Why can't I see price changes before publishing?
The left side is a copy of your published pages with the new words filled in. It cannot run the estimate tool, and the prices only exist inside that tool. So for prices the check happens after you publish: open the estimate page, pick the garment, and make sure the number is what you asked for. If it is not, tell Claude and publish again.
Does it cost anything?
Each request costs somewhere between a few cents and about twenty, which Kevin covers. Use it whenever it saves you time on a real change.
The other wayThe editor: finding your way around
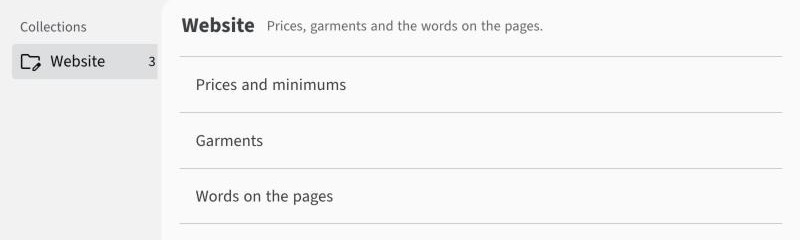
The editor is at chrispowersprint.com/admin/. After you sign in it shows one list, Website, with three forms in it:
- Prices and minimums: the rules behind the estimate tool.
- Garments: the blanks people can pick in the estimate tool, with their prices and colors.
- Words on the pages: the headings and paragraphs on the home page and the estimate page.
Open a form, change what you need, and click Save at the top right. Wait for the green "Entry saved." message; the editor then goes back to the list of forms. The site shows the change about two minutes later.
On a phone the same forms are arranged for a small screen. Save stays at the top right.
What happens when I click Save?
- The editor writes your change into the website's folder on GitHub. GitHub records it as one entry in its history, with your name on it.
- GitHub notices the change and rebuilds the website's pages from the files. That takes a minute or two.
- The new pages replace the old ones, and the change is live.
That rebuild is the reason for the short wait between saving and seeing it. If a change cannot be built, the site simply stays as it was.
The rules behind the estimate toolChange prices and minimums
- In the editor, open Prices and minimums.
- Minimum pieces per print color: with 10 here, a one-color design starts at 10 pieces and a three-color design at 30.
- Extra charge per piece for each added color: with 1.5 here, a three-color print adds $3.00 to every piece.
- Most print colors the estimate tool offers: how many colors someone can pick in the tool. It started at 6.
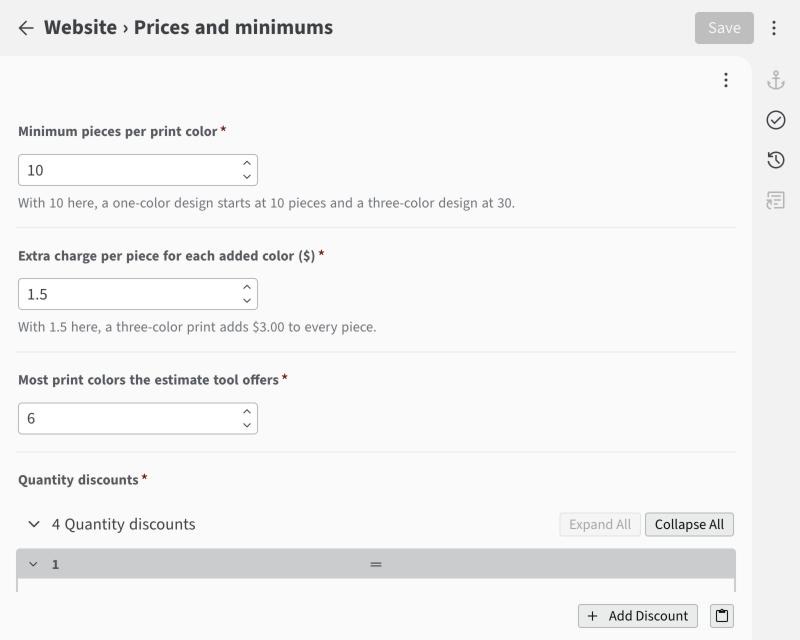
The top of the form. Save is at the top right, and grey until you change something. - Quantity discounts: each row reads "from this many pieces, this percent off". To add one, click Add Discount. Keep one row at 0 percent for your smallest order.
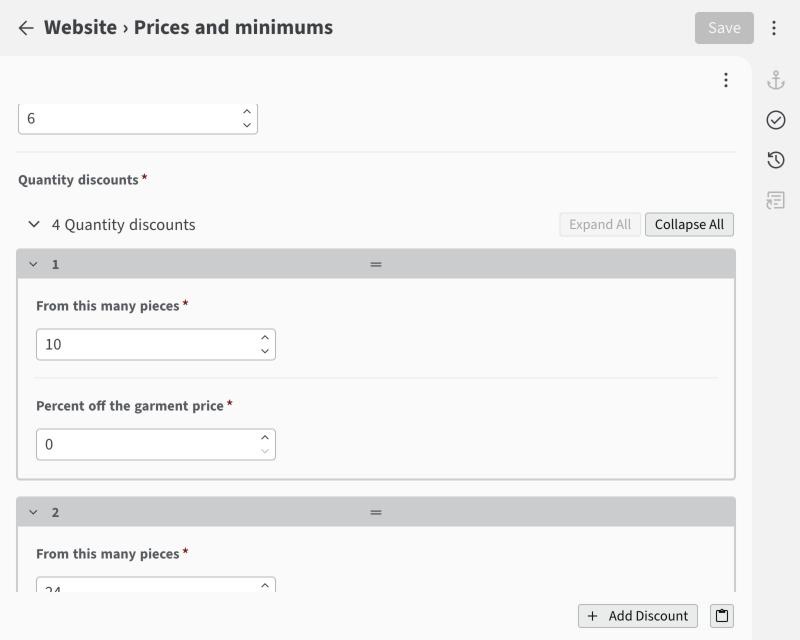
Each discount is a numbered row. Add Discount is at the bottom right. - Click Save.
The price of each garment is not here. It is on the garment itself, in the next section.
How does the tool work out a price?
It starts from the garment's price range, takes off the quantity discount for the number of pieces, and then adds the extra-color charge for every color after the first. The minimum order is the minimum per color times the number of colors.
Example with the numbers as they started: a Gildan Softstyle is $11 to $14. At 48 pieces that is 20 percent off, so $8.80 to $11.20. A three-color print adds $3.00, so about $12 to $14 a piece.
What people can pickAdd or change a garment
- In the editor, open Garments. The garments are listed one under another, each one opened out. To see them as a short list of names, click Collapse All; the small arrow at the left of a row opens that one again.
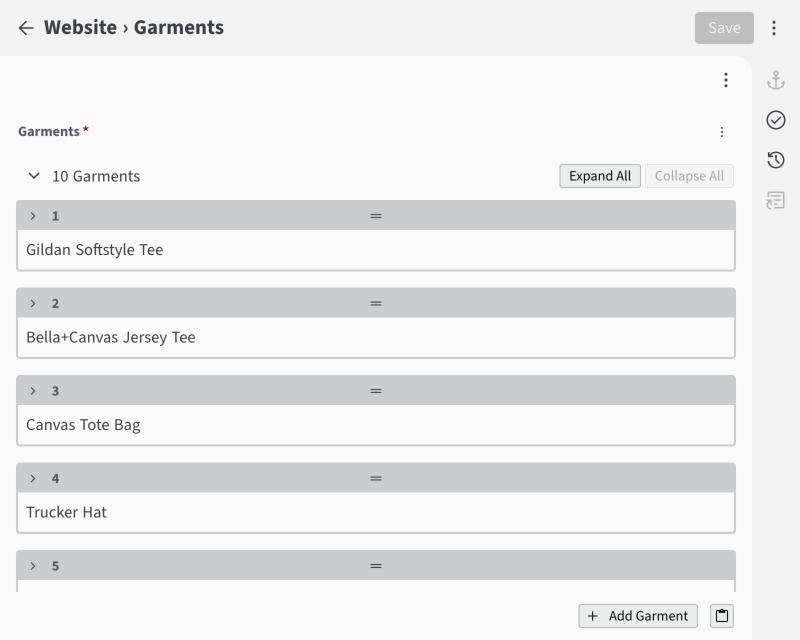
After Collapse All: one row for each garment, in the order the estimate tool shows them. - To add one, click Add Garment at the bottom right. It appears as a new row in the list.
- Fill in the Name customers will see and the Brand and style number, for example "Gildan 64000".
- Pick the Drawing: T-shirt, tote bag or hat. Hoodies, crewnecks and long sleeves use the T-shirt drawing.
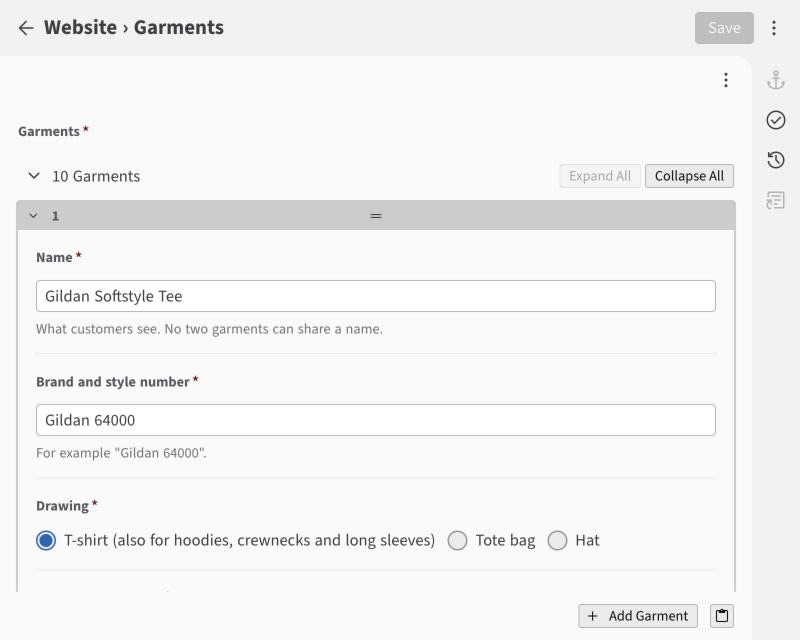
The top of one garment. - Switch Show straight away on for the handful of garments you want people to see first. The rest sit behind the Show all garments button. Keep at least one switched on.
- Set Price per piece, from and up to: your printed price for a one-color print at the minimum quantity.
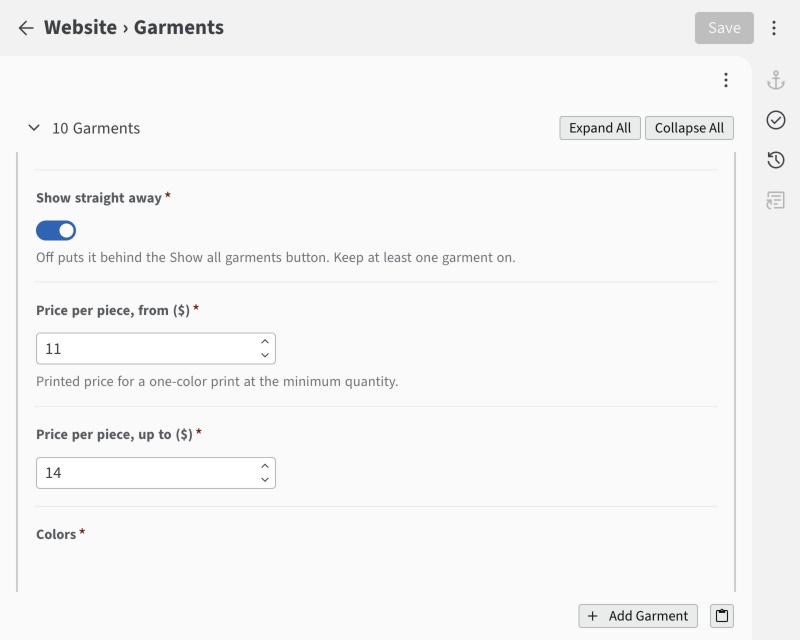
The switch and the two prices. - Add the Colors it comes in: a name and a color for each. The color is only used to tint the drawing, so close is good enough.
- Move the pointer over a row's grey bar and buttons appear at its right end: arrows that move the garment up or down, and an X that removes it. You can also drag a row by the handle in the middle of the bar.
- Click Save.
Why only a few garments up front?
Someone getting a first estimate should not have to read a catalog. The featured garments cover most jobs; everything else is one click away for the people who know what they want.
Headings and paragraphsChange the words on the pages
- In the editor, open Words on the pages.
- The boxes run in the order things appear: first the home page from top to bottom, then the bottom of every page, then the estimate page.
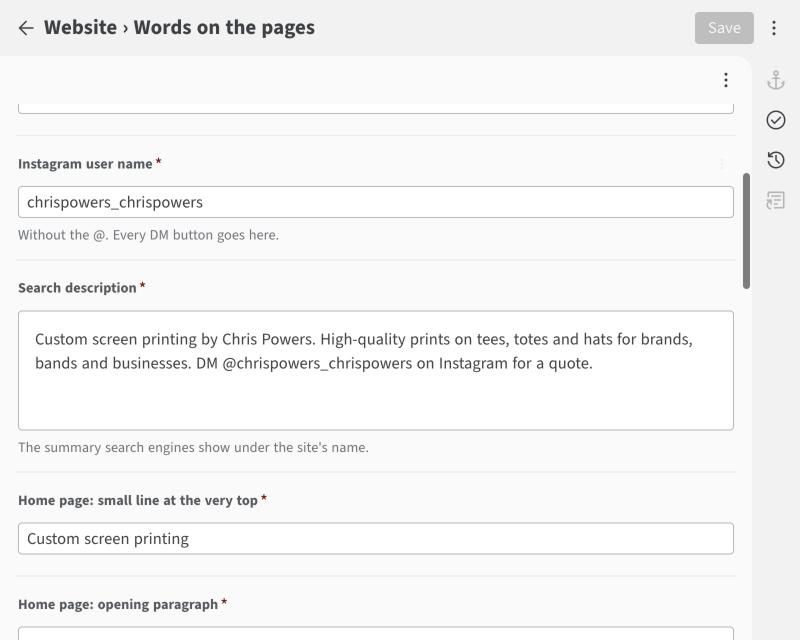
Each box says which part of which page it is. - Change what you need and click Save.
- Where you write @ followed by your Instagram user name, the site turns it into a link that opens a message to you.
- Instagram user name is the one place your handle is set. Every "DM for a quote" button follows it.
- Search description is the sentence Google shows under your site's name.
Why does one form change every page?
The pages are not written by hand. They are built from these forms each time you save. So your Instagram name lives in exactly one place, and every button and link on every page picks it up from there.
Nothing to doThe Instagram photos
The photos on the home page are your Instagram posts. The site checks your account once a day, early in the morning, and adds anything new to the top. To get a new photo on the site, post it on Instagram.
You can change how many photos are shown: it is the How many Instagram photos to show box in Words on the pages, or just ask Claude.
Why not show Instagram directly?
Google cannot read an Instagram feed that is embedded in a page. The site keeps its own copy of each post, picture and caption, as real page content, so your work can turn up in searches.
Nothing here can break the site for goodIf something goes wrong
- I saved or published, but the site looks the same. Wait three minutes, then reload the page. On a phone, pull down to refresh.
- A price on the estimate page is not what I expected. Check the garment's price, then the quantity discounts. The tool applies both.
- The Save button is grey. Nothing has changed yet.
- A box has a red star. It has to be filled in before you save.
- I changed something and it looks wrong. Change it back and save, or tell Claude to put it back. If you cannot, ask Kevin: every change is recorded and can be undone.
- It says "That did not let you in." Your GitHub account has not been added to the website yet, or you signed in with a different account. Ask Kevin.
- It is asking me to sign in again. Click Sign in with GitHub. Nothing is lost.
- Anything else. Text Kevin.